Nail art is a fun way to express yourself. Over the years, it has become very popular. There are many new trends in nail art, and you can even do them at home! In this blog post, we will explore the latest trends in nail art and give you tips on how to create these looks yourself.
Trend 1: Minimalist Nail Art
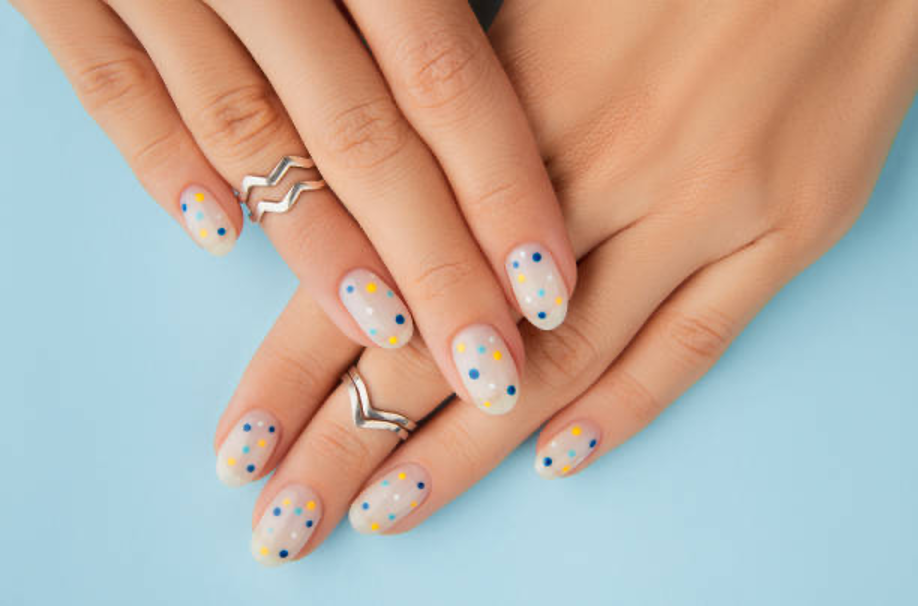
Minimalist nail art is all about simple and clean designs. This trend focuses on basic shapes, lines, and dots. It is perfect for those who like a more subtle look.
How to Do Minimalist Nail Art at Home
Gather Your Supplies:
- Nail polish in different colors
- Nail art brushes or toothpicks
- Nail tape for straight lines
- Top coat to seal the design
Prepare Your Nails:
- Clean your nails and trim them to your desired length.
- Apply a base coat to protect your nails.
Create Your Design:
- Use nail tape to create straight lines.
- Use a brush or toothpick to add dots or shapes.
- Keep the design simple and clean.
Finish Up:
Apply a top coat to make your design last longer.
Tips for Minimalist Nail Art
- Choose neutral colors like black, white, and nude for a classic look.
- Try geometric shapes like triangles and squares.
- Keep the design on one or two nails for a modern touch.
Facts About Minimalist Nail Art
- Minimalist designs are easy to do at home.
- They require fewer supplies than other styles.
- Minimalist nail art is perfect for both everyday wear and special occasions.
Trend 2: Floral Nail Art
Floral nail art is very popular, especially in the spring and summer. It involves creating beautiful flower designs on your nails. These designs can be simple or very detailed, depending on your skill level.
How to Do Floral Nail Art at Home
Gather Your Supplies:
- Nail polish in various colors for flowers and leaves
- Nail art brushes or dotting tools
- Nail stickers or stencils for easy designs
- Top coat to protect your design
Prepare Your Nails:
- Clean your nails and trim them to your desired length.
- Apply a base coat to protect your nails.
Create Your Design:
- Use a dotting tool or brush to create flower shapes.
- Start with a dot for the center of the flower.
- Add petals around the center using small strokes.
- Use green polish to add leaves if you want.
Finish Up:
Apply a top coat to make your design last longer.
Tips for Floral Nail Art
- Practice on a piece of paper first to get the shapes right.
- Use bright colors like pink, yellow, and blue for a vibrant look.
- Mix and match different flower designs on each nail.
Facts About Floral Nail Art
- Floral designs can be simple or detailed.
- This style is perfect for spring and summer.
- Nail stickers and stencils can make it easier for beginners.
Trend 3: Gradient Nail Art
Gradient nail art, also known as ombre, involves blending two or more colors on your nails. This trend looks stunning and can be customized with various color combinations.
How to Do Gradient Nail Art at Home
Gather Your Supplies:
- Two or more nail polish colors
- Sponge (makeup sponge works well)
- Top coat
Prepare Your Nails:
- Clean and trim your nails.
- Apply a base coat.
Create the Gradient:
- Paint stripes of different colors on the sponge.
- Dab the sponge on your nail to transfer the colors.
- Repeat until you get the desired gradient effect.
Finish Up:
Apply a top coat to blend the colors and make the design last.
Tips for Gradient Nail Art
Use colors that blend well together, like blue and purple or pink and orange.
Clean the edges with a brush dipped in nail polish remover for a neat finish.
Apply thin layers to avoid a bulky look.
Facts About Gradient Nail Art
Gradient designs can be subtle or bold, depending on the colors used.
This style is perfect for both casual and special occasions.
Practice makes perfect with gradient nail art.
Gradient nail art is a beautiful way to experiment with colors. With some practice, you can create stunning looks that will impress everyone.
Trend 4: Marble Nail Art
Marble nail art mimics the look of marble stone. It is elegant and can be done using various techniques.
How to Do Marble Nail Art at Home
· Gather Your Supplies:
- Base color nail polish
- White or contrasting nail polish
- Plastic wrap or nail art brush
- Top coat
Prepare Your Nails:
Clean and trim your nails.
Apply a base coat and your base color.
Create the Marble Effect:
Dab white polish on a crumpled plastic wrap.
Lightly press the plastic wrap on your nail to create a marble effect.
Alternatively, use a nail art brush to draw thin lines for a marble look.
Finish Up:
Apply a top coat to seal the design.
Tips for Marble Nail Art
- Use a light touch with the plastic wrap for a more natural look.
- Experiment with different colors for unique designs.
- Practice on a piece of paper to perfect your technique.
Final Words
Nail art trends like minimalist, floral, gradient, and marble offer fun and creative ways to express yourself. These designs can be done at home with some practice and the right tools. Whether you prefer simple, colorful, or sophisticated styles, there’s a nail art trend for everyone.